Views: 0 Author: Site Editor Publish Time: 2026-04-20 Origin: Site


Think about your last environmental test. Were you completely sure that the temperature reading on the chamber display matched the actual condition inside? A difference of just 0.5°C or 2% RH can turn a passing product into a field failure. Calibration is not paperwork—it is the difference between reliable data and costly mistakes.
One customer in Saudi Arabia recently shared his experience with LIB's TH-80 benchtop temperature humidity chamber. He wrote: "Good evening. Dear Karen. I truly appreciate your continued support. It's been a while since our last operation, and everything went well at that time. If we encounter any issues, I will be sure to contact you." This is the kind of trust that comes from equipment that stays accurate, test after test, without nexpected drift or failures.
This article explains benchtop temperature humidity chamber basics, why calibration matters, step‑by‑step calibration procedures, troubleshooting tips, and compliance schedules—all with practical numbers and clear language.
Regular calibration of your benchtop chamber ensures accurate temperature and humidity readings, which is vital for reliable test results.
Use certified reference instruments for calibration to maintain high precision and meet industry standards.
Keep detailed records of calibration dates and results to track performance and support quality control.
Follow a consistent calibration schedule, ideally every six months to a year, based on usage and application criticality.
Prepare your chamber and workspace before calibration to minimize errors and ensure consistent results.
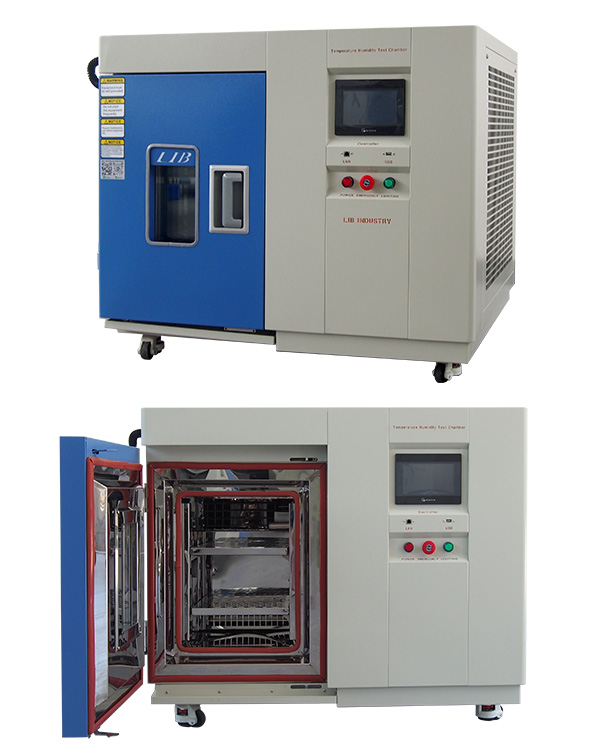
A temperature humidity chamber benchtop gives you a compact and powerful way to test how products react to different temperature and humidity levels. You can fit this chamber on a workbench or in a small lab, making it ideal for places with limited space. The benchtop temperature and humidity test chamber uses advanced controllers and sensors to keep conditions steady and accurate.
You will find these chambers in many industries. They help you test materials, electronics, and aerospace products. The table below shows common application areas and what you can do with a benchtop humidity chamber:
Application Area | Description |
|---|---|
Aerospace Products | Test performance under high temperature or humidity conditions. |
Information Electronic Instruments | Check reliability in controlled environments. |
Materials | Assess properties and durability in changing temperature and humidity. |
Electrical Engineering | Test components for performance in extreme conditions. |
Electronic Products | Ensure reliability during storage and transport. |
Electronic Components | Conduct adaptability tests for high and low-temperature environments. |
You can also use a desktop constant temperature and humidity test chamber to optimize space and energy use. The table below highlights how the compact size benefits your lab:
Evidence Point | Description | |
|---|---|---|
Precision Control | Maintain high performance in small spaces, important for small labs. |  |
Energy Efficiency | Lower utility needs help you save on costs. | |
Ease of Installation | Standard connections make setup quick and easy. | |
Portability | Move the chamber easily for temporary setups or sharing. | |
Space Optimization | Use your lab space more efficiently. |
You need to calibrate your benchtop temperature and humidity test chamber to get accurate results. Calibration makes sure the temperature and humidity readings match real values. If you skip calibration, your data may be wrong, and your products could fail in real-world conditions.
A well-calibrated benchtop humidity chamber uses high-precision sensors, like PT100 Class A, to keep temperature within ±0.5 °C and humidity within ±2.5 % RH. Before you get your chamber, the factory checks it with multiple probes to make sure it meets strict standards. When you calibrate your temperature and humidity test chamber regularly, you keep your temperature and humidity system reliable for every test.
Tip: Always keep a record of your calibration dates and results. This helps you track performance and meet quality standards.
LIB factory calibration includes two steps: temperature and humidity.
| Name | small humidity chamber |
| |
| Model | td-50 | td-80 | |
| Internal dimension (mm) | 320x350x450 | 400x400x500 | |
| Overall dimension (mm) | 800x1050x950 | 900×1100×1000 | |
| Temperature range | -20℃ ~+150 ℃ | ||
| Low type | Ⅰ: -40℃ Ⅱ: -70℃ Ⅲ: -86℃ | ||
| Temperature fluctuations | ± 0.5 ℃ | ||
| Humidity Range | 10%/20%~95% | ||
| Temperature deviation | ± 2.0 ℃ | ||
| Heating rate | 3 ℃ / min | ||
| Cooling rate | 1 ℃ / min | ||
| Temperature Sensor | PTR Platinum Resistance PT100Ω/MV A-class | ||
| Temperature Resolution | ± 0.001 ℃ | ||
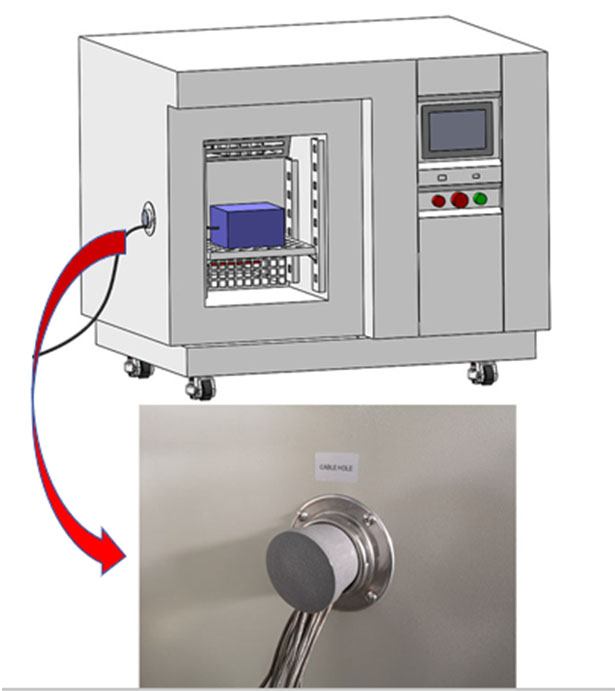 | 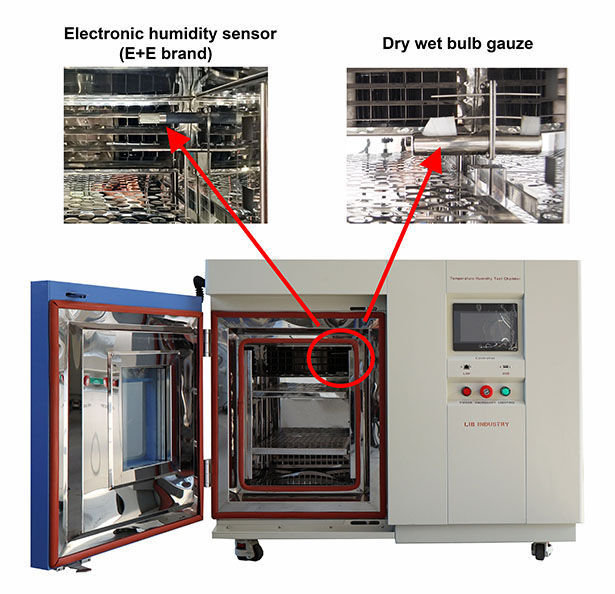 | 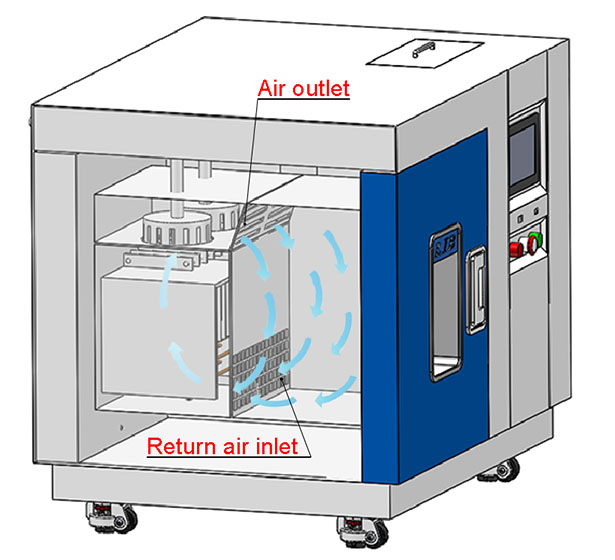 |
Power Supply Cable Hole | Temperature and Humidity Sensor | Air circulation |
We place 9 temperature probes evenly inside the chamber (corners + center). We record each reading, calculate the average, and compare it to
the standard value. If there is a deviation, we adjust the hardware until all 9 points meet the target.
This ensures uniform temperature across the entire working space.
Use the same method for other equipment: Place 9 certified probes inside any chamber, oven, or incubator. Record readings, calculate the average, and compare with the display. Adjust or document the deviation.
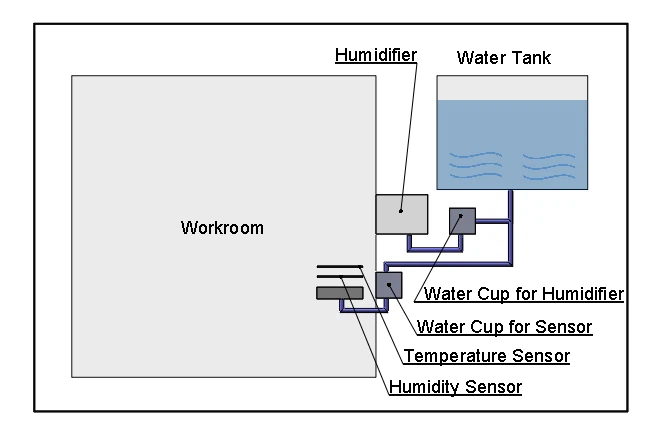
Record dry bulb and wet bulb temperatures.
Use a lookup table to find humidity based on the temperature difference.
Compare measured humidity to the standard.
Adjust hardware parameters if needed.
Result: Precise, repeatable temperature and humidity control before every chamber leaves the factory.
Based on LIB's Benchtop Temperature Humidity Test Chamber, you can also use this equipment to calibrate temperature and humidity sensors on other equipment, ensuring accurate readings across your entire lab.
|  |  | |
|---|---|---|---|
 |  |  | |
| Name | Small temperature humidity chamber for Calibration | Standing temperature humidity chamber for Calibration | Walk-In temperature humidity chamber for Calibration |
| Capacity | TH-50: 800x1050x950 mm TH-80: 900×1100×1000mm | Capacity: 100L; 225L; 500L; 800L; 1000L | >20m³ |
| Throughput | Ideal for small components, sensors, boards | Subassemblies or mid-volume batches | Bulk testing of items or vehicles as a whole |
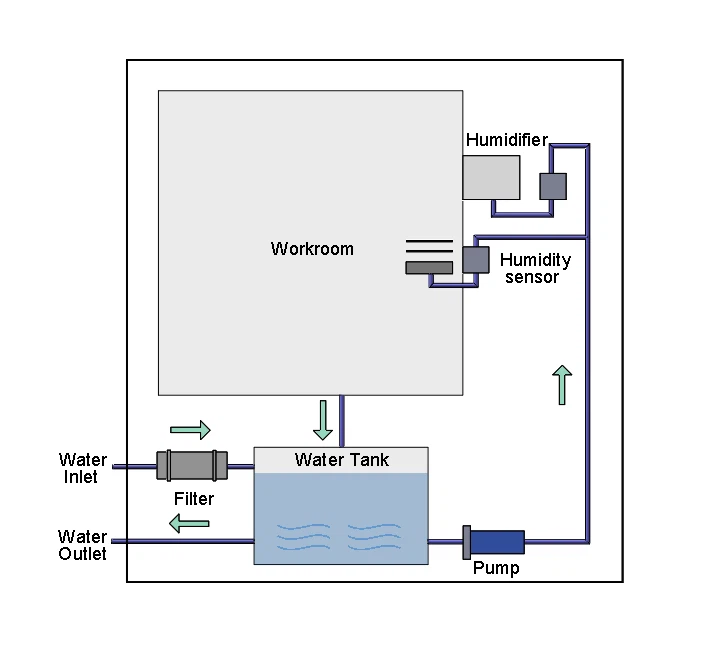
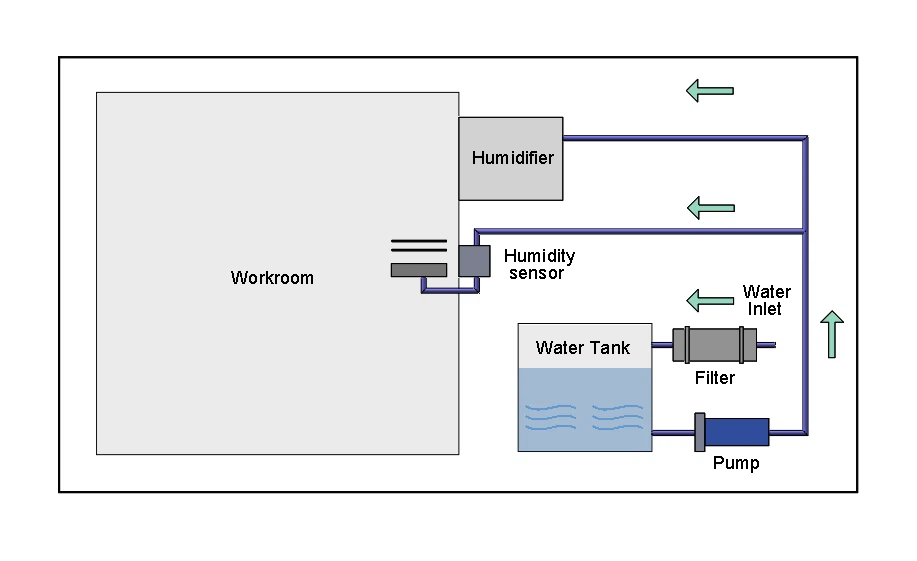
| Energy Saving | Automatic Moisture Circulation in Humidity System
| Automatic Moisture Circulation in Humidity System
| Automatic Moisture Circulation in Humidity System
|
| Operational Cost | Lowest | Medium | Highest |
| Standards Coverage | Full IEC / ISO / ASTM compliance | ||
| Noise Level | ≤ 65 dBA | ||
Start your calibration by inspecting the benchtop temperature and humidity test chamber. Check the chamber for any visible damage or signs of wear. Make sure the chamber is clean and free from dust or debris. Remove all samples and accessories from the chamber to avoid interference with the calibration process.
Next, verify that the power supply is stable and the chamber is connected properly. Turn on the chamber and let it stabilize at room temperature for at least 30 minutes. This step helps you achieve accurate humidity and temperature control during calibration. Confirm that all sensors and controllers are functioning. Review the chamber’s display to ensure it shows normal operation.
Tip: Always wear appropriate safety gear and follow your lab’s safety protocols during setup.
To calibrate your benchtop humidity chamber, you need to establish reference conditions for temperature and humidity. Use certified reference sensors with higher precision than the chamber’s built-in sensors. Place these reference sensors inside the chamber at different locations to check for uniformity.
Follow these steps to set up reference conditions:
Step | Description |
|---|---|
1 | Place certified reference sensors in the chamber |
2 | Run controlled environmental cycles |
3 | Compare chamber readings to traceable standards |
4 | Adjust the system if deviations are found |
Run the chamber through a series of temperature and humidity setpoints. For example, you might select 25°C and 50% RH, then 40°C and 80% RH. Allow the chamber to stabilize at each setpoint before recording any data. This process ensures that your benchtop temperature and humidity test chamber provides accurate readings across its full range.
Note: Document all test parameters, sensor locations, and environmental conditions. Good records help you maintain traceability and repeatability.
After you set the reference conditions, compare the chamber's readings with those from your reference sensors. If you find any differences, adjust the chamber’s controls to match the reference values. This step is crucial for achieving accurate humidity and temperature control.
You should use the following methods to verify the accuracy of your benchtop temperature and humidity test chamber:
Select calibration standards and equipment with higher precision than the chamber.
Develop a clear calibration procedure to ensure reliable and repeatable results.
Take calibration measurements by comparing chamber readings with reference sensor values at several points across the usable range.
Analyze the data and make adjustments as needed to align the chamber with the reference standards.
Record every adjustment and measurement in your calibration log. Include details such as the date, time, test parameters, and results. This documentation supports quality control and helps you meet industry standards.
Tip: Calibration records are essential for compliance and product certification. Always keep your records organized and accessible.
By following these steps, you ensure your benchtop humidity chamber delivers reliable temperature and humidity results. Regular calibration protects your data quality and supports your lab's reputation for accuracy.
You should set a regular calibration schedule for your benchtop temperature and humidity test chamber. Most manufacturers recommend calibrating at least once a year. Some labs choose to calibrate every six months for higher accuracy. Regular calibration helps you keep your benchtop humidity chamber reliable and ensures your test results stay consistent.
You can see the main benefits of routine calibration below:
You improve accuracy and reliability.
You meet industry standards.
You support quality control in your lab.
You save money by preventing costly errors.
You extend the life of your equipment.
The right calibration interval depends on several factors. Review the table to see what influences your schedule:
Factor | Description |
|---|---|
Usage intensity | Chambers used all day need more frequent calibration. |
Temperature range | Extreme temperature cycles require shorter intervals. |
Application criticality | Safety-critical tests need tighter schedules. |
Historical drift | Stable chambers may allow longer intervals. |
Regulatory requirements | Some rules set specific calibration times. |
Environmental factors | Variable lab conditions may shorten intervals. |
You should always check your chamber's manual and follow your industry's guidelines for calibration timing.
You must follow strict standards when calibrating your benchtop temperature and humidity test chamber. International standards like IEC, ISO, MIL, and ASTM set requirements for accuracy, stability, and long-term performance. These standards help you keep your benchtop humidity chamber compliant and your data trustworthy.
Some common standards include:
ASTM D2247
IEC 60068-2-78
MIL-STD-810
You may also need to meet specific compliance requirements for your industry. The table below lists important standards and their focus:
Compliance Standard | Description |
|---|---|
IEC 60068 | Environmental testing standards |
MIL-STD-810G | Military standard for environmental testing |
ASTM D4332 | Guide for humidity testing |
ISO 9022 | Optical and photometric testing standards |
UL 1703 | Safety standard for solar panel testing |
You should keep detailed records of every calibration for your benchtop humidity chamber. Good documentation helps you pass audits and proves your benchtop temperature and humidity test chamber meets all requirements.
Note: Following the right schedule and standards protects your lab’s reputation and ensures reliable temperature and humidity results.
You protect your lab's results when you calibrate your benchtop temperature and humidity chamber on a regular schedule. Accurate calibration gives you reliable temperature and humidity readings for every test. When you keep detailed calibration records, you gain many long-term benefits:
You improve accuracy and reliability.
You meet industry standards and regulations.
You strengthen quality control and customer satisfaction.
You save money by preventing costly errors.
You extend the life of your equipment.
Stay consistent with your calibration routine to ensure the best results.
You should calibrate your chamber at least once a year. If you use it daily or for critical tests, consider calibrating every six months. Always check your manufacturer's recommendations.
You need a certified reference thermometer, a calibrated hygrometer, and a data logger. These tools help you compare and adjust the chamber's readings for accuracy.
You can perform basic calibration if you have the right tools and training. For best results, hire a qualified technician or use an accredited calibration service.
First, check for sensor drift or loose connections. Clean the chamber and repeat the test. If problems continue, contact technical support or schedule professional maintenance.
Contact LIB Industrytoday for a benchtop temperature humidity chamber that stays accurate test after test. Email us to request a quote, a calibration guide, or a personalized consultation for your lab.